
Step 1: Downloading MySQL
Head to the official MySQL Installer for Windows page: https://dev.mysql.com/downloads/installer/
Depending on your internet connection:
- For stable connections: Download mysql-installer-web-community-8.0.34.msi
- For slower connections: Opt for mysql-installer-community-8.0.34.msi
NB: To make this tutorial easy to follow along with, we have attached images for each step. These images illustrates all the actions described in the step. If you aren’t sure of any of the information in a particular step, do go through the images in that step to get a complete overview of what is expected.
Step 2: Launching the Installer
Once downloaded, locate the file and double-click on it to initiate the installation process.

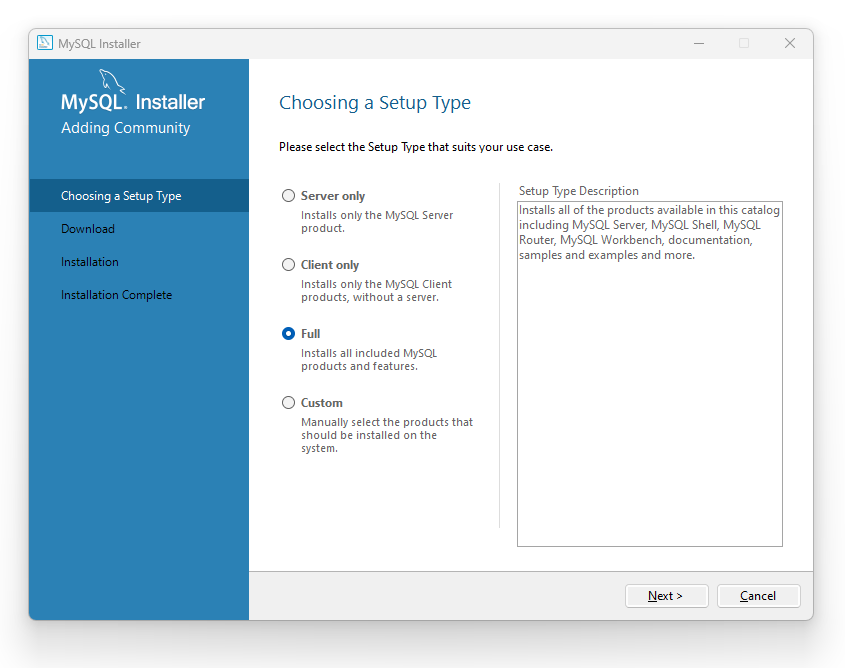
Step 3: Choosing Your Setup
Upon reaching the “Choosing a Setup Type” screen, select the “Full” option to install all available MySQL features. Click on “Next” to proceed.
Step 4: System Requirements Check
The installer will now verify if your system meets the necessary requirements.
If any issues arise, select each problematic item and click “Execute”.
This lets the installer handle and install any missing requirements automatically.
Once resolved, hit the “Next” button.


Step 5: Product Installation
On the “Installation” screen, review the list of products set for installation.
Click “Execute” and let the installer do its job. Once done, move ahead by pressing “Next”.


Step 6: Configuring MySQL Server
The “Product Configuration” screen will appear. Here:
- Select “MySQL Server 8.0.34”.
- Hit “Next”.
- Choose the “Standalone MySQL Server/Classic MySQL Replication” setup.
- For “Type and Networking”, select “Development Computer”, set “Connectivity” to “TCP/IP”, and assign “Port” as “3006”.
- Press “Next” to continue.


Step 7: Setting Up Authentication
In the “Authentication Method” section, ensure you choose “Use Strong Password Encryption for Authentication”. Move on by clicking “Next”.

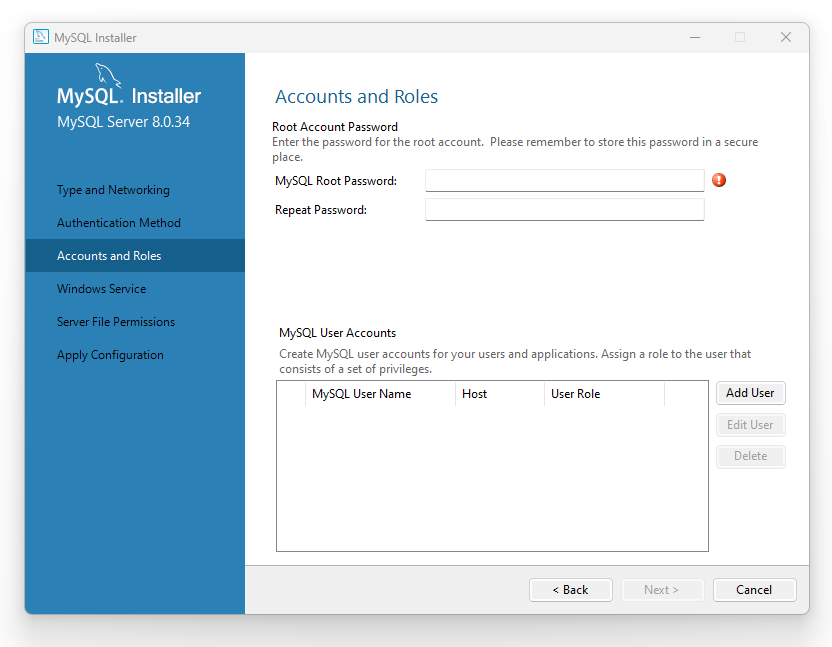
Step 8: Creating Your Root Account
In the “Accounts and Roles” section, set up a password for the root account. Remember this password for future reference. Click “Next”.
Step 8b: Adding a New User Account
Still under “Accounts and Roles”, click “Add User”.
- Provide a username, host, and password.
- Assign appropriate privileges for the new user.
- After setting up the new user, click “Next”.


Step 9: Windows Service Configuration
This step allows MySQL to run as a Windows service.
Stick with the default settings and click “Next”.


Step 10: Finalizing Server Configuration
On the “Apply Configuration” screen, hit the “Execute” button.
Once the server configuration is applied, click “Finish”.


Step 11: Wrapping Up Product Configuration
You’ll be notified once the product configuration completes. Keep the default settings intact.
Click “Next” and then “Finish” to wrap up the MySQL installation.

Step 12: Router Configuration (Optional)
If you wish to set up the Router, follow the on-screen instructions. Otherwise, click “Next” and then “Finish”.


Step 13: Connect to Your Server
At the “Connect To Server” screen:
Enter the root password you set earlier.
Click “Check” to test the connection.
If successful, press “Next”.


Step 14: Final Configuration Steps
In the “Apply Configuration” segment, choose your desired options and click “Execute”.
After this, click “Finish”.


Step 15: Celebrate a Successful Installation
The “Installation Complete” screen indicates a job well done! Click “Finish” to close the installer.


Confirming Your MySQL Installation
Using the Start Menu:
- Launch the MySQL Command Line Client by entering it in the command prompt (cmd).
- Click on the Windows Start menu.
- Search for “MySQL”.
- You should see an entry named “MySQL Command Line Client” or similar. Click on it to open.
- You’ll be greeted with a mysql> prompt. If you’ve previously set a password, enter it when prompted.
- Once connected to the MySQL server, you can execute SQL commands directly at the mysql> prompt.
Using the Command Prompt:
- Press
Win + Rkeys together to open the Run dialog. - Type
cmdand press Enter to open the command prompt. - If the MySQL bin directory is in your system’s PATH, you can simply type
mysql -u root -pand press Enter.- The
-u rootspecifies that you want to log in as the root user. - The
-poption will prompt you to enter the password for the user.
- The
- If it’s not in your PATH, you’ll first need to navigate to the MySQL
bindirectory or provide its full path. For instance:
C:\path\to\mysql\bin\mysql -u root -p
You can however follow this guide to add MySQL to your environment variables: Adding MySQL to Your Windows Environment Variables
Tip: Try viewing your existing databases by typing the command show databases;.
Conclusion
Successfully installing MySQL on Windows is a stepping stone to harnessing its powerful database capabilities.” Dive deeper into our other insightful posts, and for real-time updates and tips, follow us on Twitter at @learninbits.
4 Comments
[…] Setting up MySQL on your computer is a great achievement, but to make it even more efficient to access and use the MySQL tools directly from the command prompt, you should add it to your Windows environment variables. However, if you are yet to install MySQL on your computer then follow this simple guide to install it: Installing MySQL on Windows: A Step-by-Step Guide […]
This is a well detailed procedure. It really helped. thank you so much for taking time to compile.
This is a great tutorial. This definitely made the stressful process of installation a whole lot easier. Great work!
THANKS. very very helpful